The get() function and the Pixel Array
Working in the pixel array can be a difficult thing to wrap your head around, but once mastered, you will see the power of it, and the many uses it has. Think of your image as a big list of pixels. Pixels can have an x and y coordinate based on where they are in the image. To get the color information of any one pixel, we use the get() function like this
color c = get(x,y);
this will return the color that is in that pixel. The following is a representation of an image, with 16 pixels in it. It contains the colors, red, blue, gree, black and white
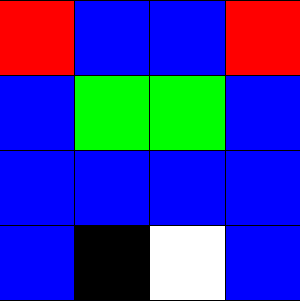
If we ran the following code on this very small image
color c = get(1,1);
 println(c);
in processing would print out a weird number, -65536. This is the color red, in a weird binary form. To convert it to something we can read, we can use the hex() function.
color c = get(1,1);
println(hex(c,6));
Which should return FF0000, the hex color for red.
color c = get(3,2);
println(hex(c,6));
Would return green
color c = get(4,4);
println(hex(c,6));
would return blue
So what does that do?
Now that we have this information, what are we going to do with it?!? Go ahead and download the grid.gif file and import it into a sketch. You can use the menu item Sketch>Add File, or just make a data folder in your sketch folder and place the file there. You can also drag and drop the file on the text editor. The following code example imports the image, and by using a for() loop walks through all of the pixels, replacing any pixel that is red (#FF0000), with black (#000000);
PImage img; //declare the image
void setup(){
  size(300,300);
  background(#ff0000);
  img = loadImage("grid.jpg"); //load the image, but do not display yet

  color checkColor = color(#FF0000); //the color to check for
  color setColor = color(#000000); //the color to replace it with

  for(int x=0;x<=img.width;x++){//loop through rows of pixels
    for(int y=0;y<=img.height;y++){//for all the rows in the image
      color check = img.get(x,y);//check the pixel for the color
      if(check==checkColor){//if it is the color
        img.set(x,y,setColor);//replace that pixel with another color
      }
    }
  }
  image(img,0,0);//now show the image
}
Now we can use image data to selectively change parts of our image, pixel by pixel. We can make this process much faster by directly accessing the pixel array. The pixel array is an array of color values. Just like any other array it starts at 0 and increases. This might be slightly harder to think about, because pixels are not referred to by the x and y coordinate, but rather the key of the array. so color c = get(10,10) is the same thing as saying color c = pixels[y*width+x]. Let’s look at our little grid image, at 4pixels x 4pixels, and see what comes up
pixel[0] is the top left most pixel, it is red.
pixels[5] is the left most pixel on the second row, it is blue.
pixel[7] is the 3rd from left pixel on the second row, it is green.
pixel 15[0] is the right most pixel on the bottom, it is blue.
While this seems like a lot more work to do the same thing, there is a speed boost in directly referencing the pixel array, so if your application starts to lag while using the get() function, you should reference the pixel array directly. To do the same thing we did above using the pixel array, use the following method
//pixel array method
  img.loadPixels();//address the pixels directly, hello pixels!!!
  for(int p=0;p<img.width*img.height;p++){//loop through all the pixels
    if(img.pixels[p]==checkColor){//if the pixel has the color we are checking for
       img.pixels[p]=setColor;//replace it with the new color
    }
  }
  img.updatePixels();//then update the pixels
Uses the pixel and a mask file to turn some pixels in a graphic invisible by setting the alpha value to zero
Filters
A little bit easier to handle are the image filters and blending modes. If you have ever used photoshop, you should be familiar with these. The following filters are available in processing
- THRESHOLD
- GRAY
- OPAQUE
- INVERT
- POSTERIZE
- BLUR
- ERODE
- DILATE
You can apply the filter to everything in the image by using filter(), or attach it to a PImage or PGraphics object like this
PImage img = loadImage("fuu.jpg");
img.filter(BLUR,10)
the example above will add a blur filter with a strength of 10. Every one of the filters has a different type of input, so go over to the processing site to learn the specifics. This article also speaks to much of the specifics of pixel manipulation in processing, or check out my filter picker here. Be warned: It’s slow
Get() to crop images
Get can also be used to crop an image. when you add the 3rd and 4th parameter get becomes
get(x,y,width,height)
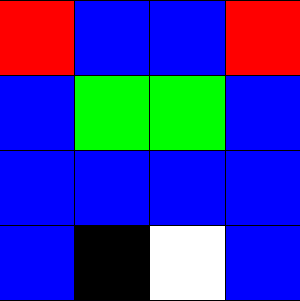
and the data that you are getting is more then one pixel, it is an image. Using the same sketch as above, load the image and then load part of the image into another image
PImage img, cropimage; //declare the image
void setup(){
  size(300,300);
  background(#ff0000);
  img = loadImage("grid.jpg"); //load the image, but do not display yet
 cropimage = img.get(0,0,200,100);
 image(cropimage,0,0);
}


Leave a Reply